

DIY | KITCHEN
When we started house hunting in 2023, we’d just had our daughter and were by no means anticipating starting a huge renovation project. I think my words were ‘I’ll paint and do flooring but I don’t want to be ripping out a kitchen.’ Little did I know, after months of browsing Rightmove and scrolling straight past our house thinking ‘no way,’ we’d eventually view it and both immediately see it’s potential.
Join us as we learn new skills, rope in family and friends to help, get creative and turn this old house into our family home - on a budget!
Create a concealed cooker hood with this easy DIY


One of the key parts of our renovation - the kitchen dining space. I’ve been scrolling Pinterest for months looking at all these stunning kitchens with beautiful built in cooker hoods, but they were just totally out of budget. I was determined there was a way we could create this look for less, so after a few video calls with my dad and a bunch of drawings, we managed to do it, and you can too!
Important advice - get a qualified electrician to install the cooker hood - ours is one with an outside vent rather than one that recirculates air, and my electrician father in law was in charge of installation. Drilling a large hole in the side of our house was a particularly tense moment!
Materials
We used 6mm MDF for the panels, construction timber for the framework and some simple moulding that I found at B&Q for the edging. You’ll then need a drill and all the component parts, rawlplugs, wood glue, filler, sandpaper and your paint of choice! We went for a Dulux Heritage colour, Setting Stone. More on paint later.
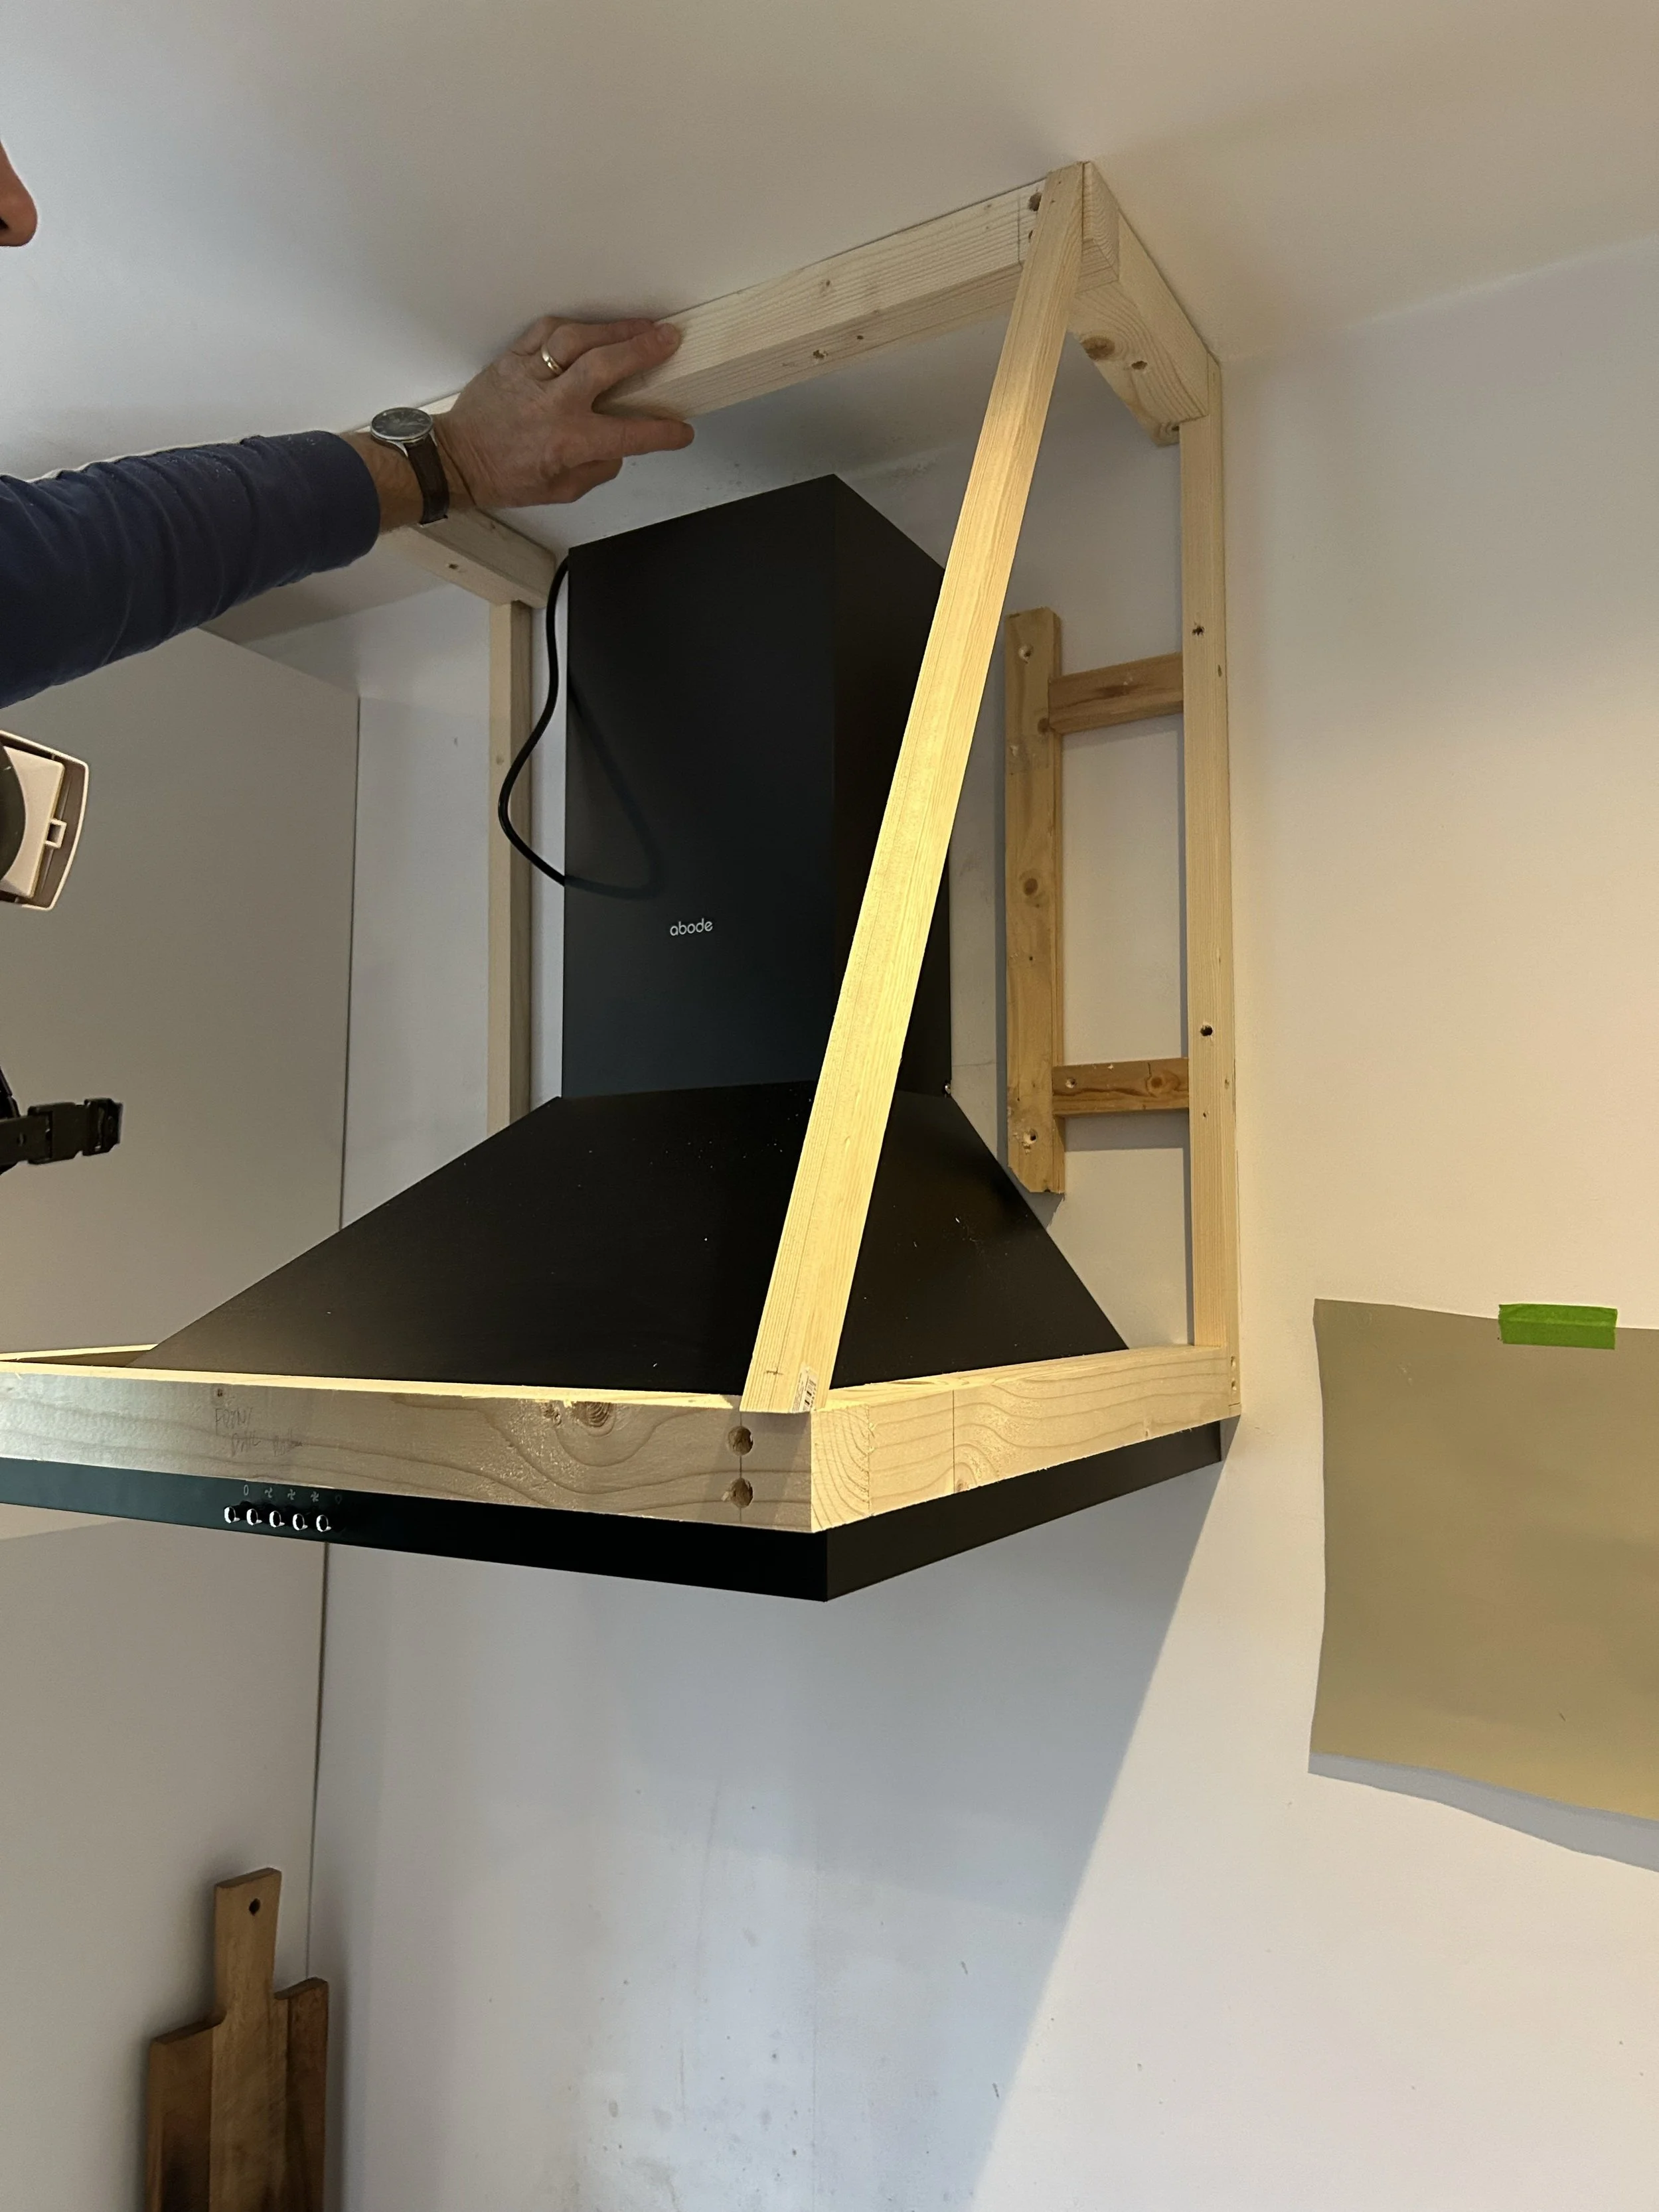
The Design
The design was essentially two frames, the smaller one attached to the ceiling and the larger one around the base of the hood, secured and stabilised by two vertical pieces in between which were fixed to the wall. Then another two batons sloping between them to create the frame.
You could make the two frames the same size if you wanted a straight front to your cooker hood, but we decided this shape would work better in our space. The beauty of this design is that you can adjust based on your space and style.
Problem #1
The main thing you have to be aware of when securing anything to the wall is where your cables and pipes are. As my father in law rewired the house, we knew exactly where the cables were, but unfortunately the cables to the oven ran exactly where we needed to secure the frame.
Our solution? Create a supporting piece slight to the left which was firmly secured to the frame, and then this was fixed to the wall. Luckily we didn’t have the same issue on the other side.
Problem #2
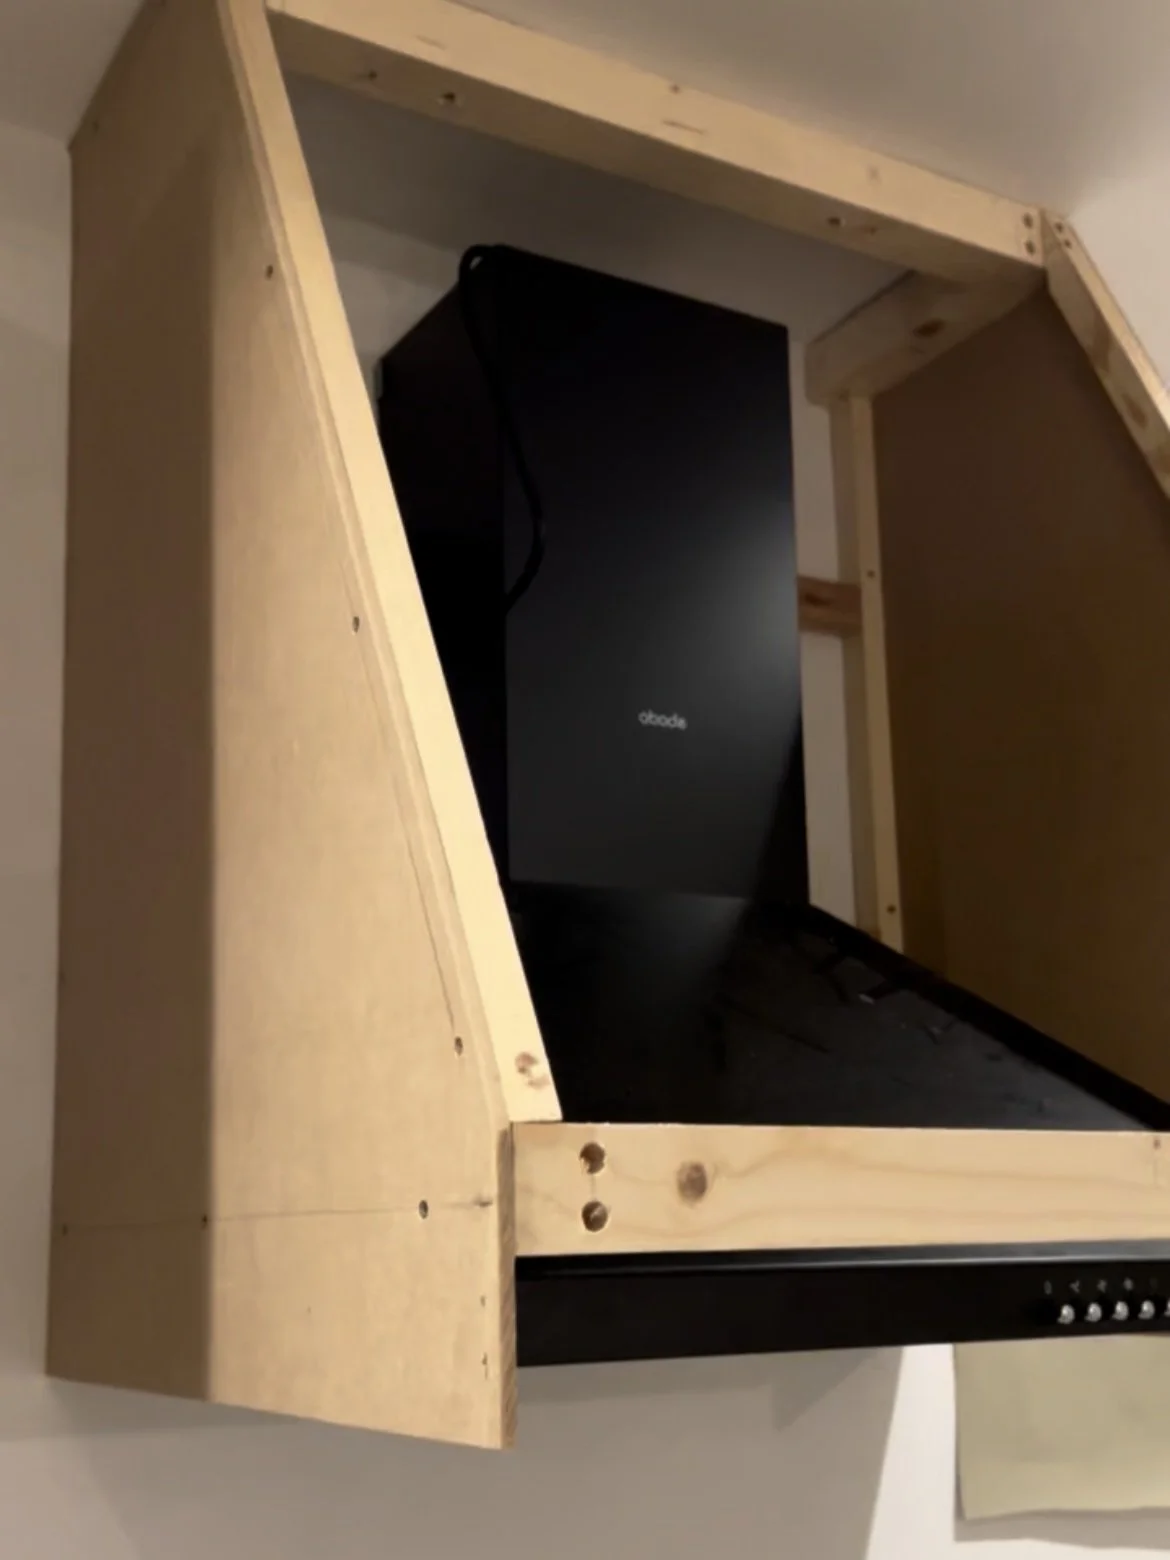
We bought the wrong cooker hood! This DIY wasn’t something I had thought about when we purchased all the appliances, so we bought a hood with the buttons on the front instead of underneath. So first up was to figure out how we could conceal the buttons but still make them accessible.
It was actually quite an easy solution! We edited the design slightly so that the front horizontal panel that sits at the base of the hood was slightly further forward than it needed to be, so that when we secured the front panel on, there would be enough space in front of the buttons to easily use them. I can confirm - after 6 months of using this every day - it works really well.
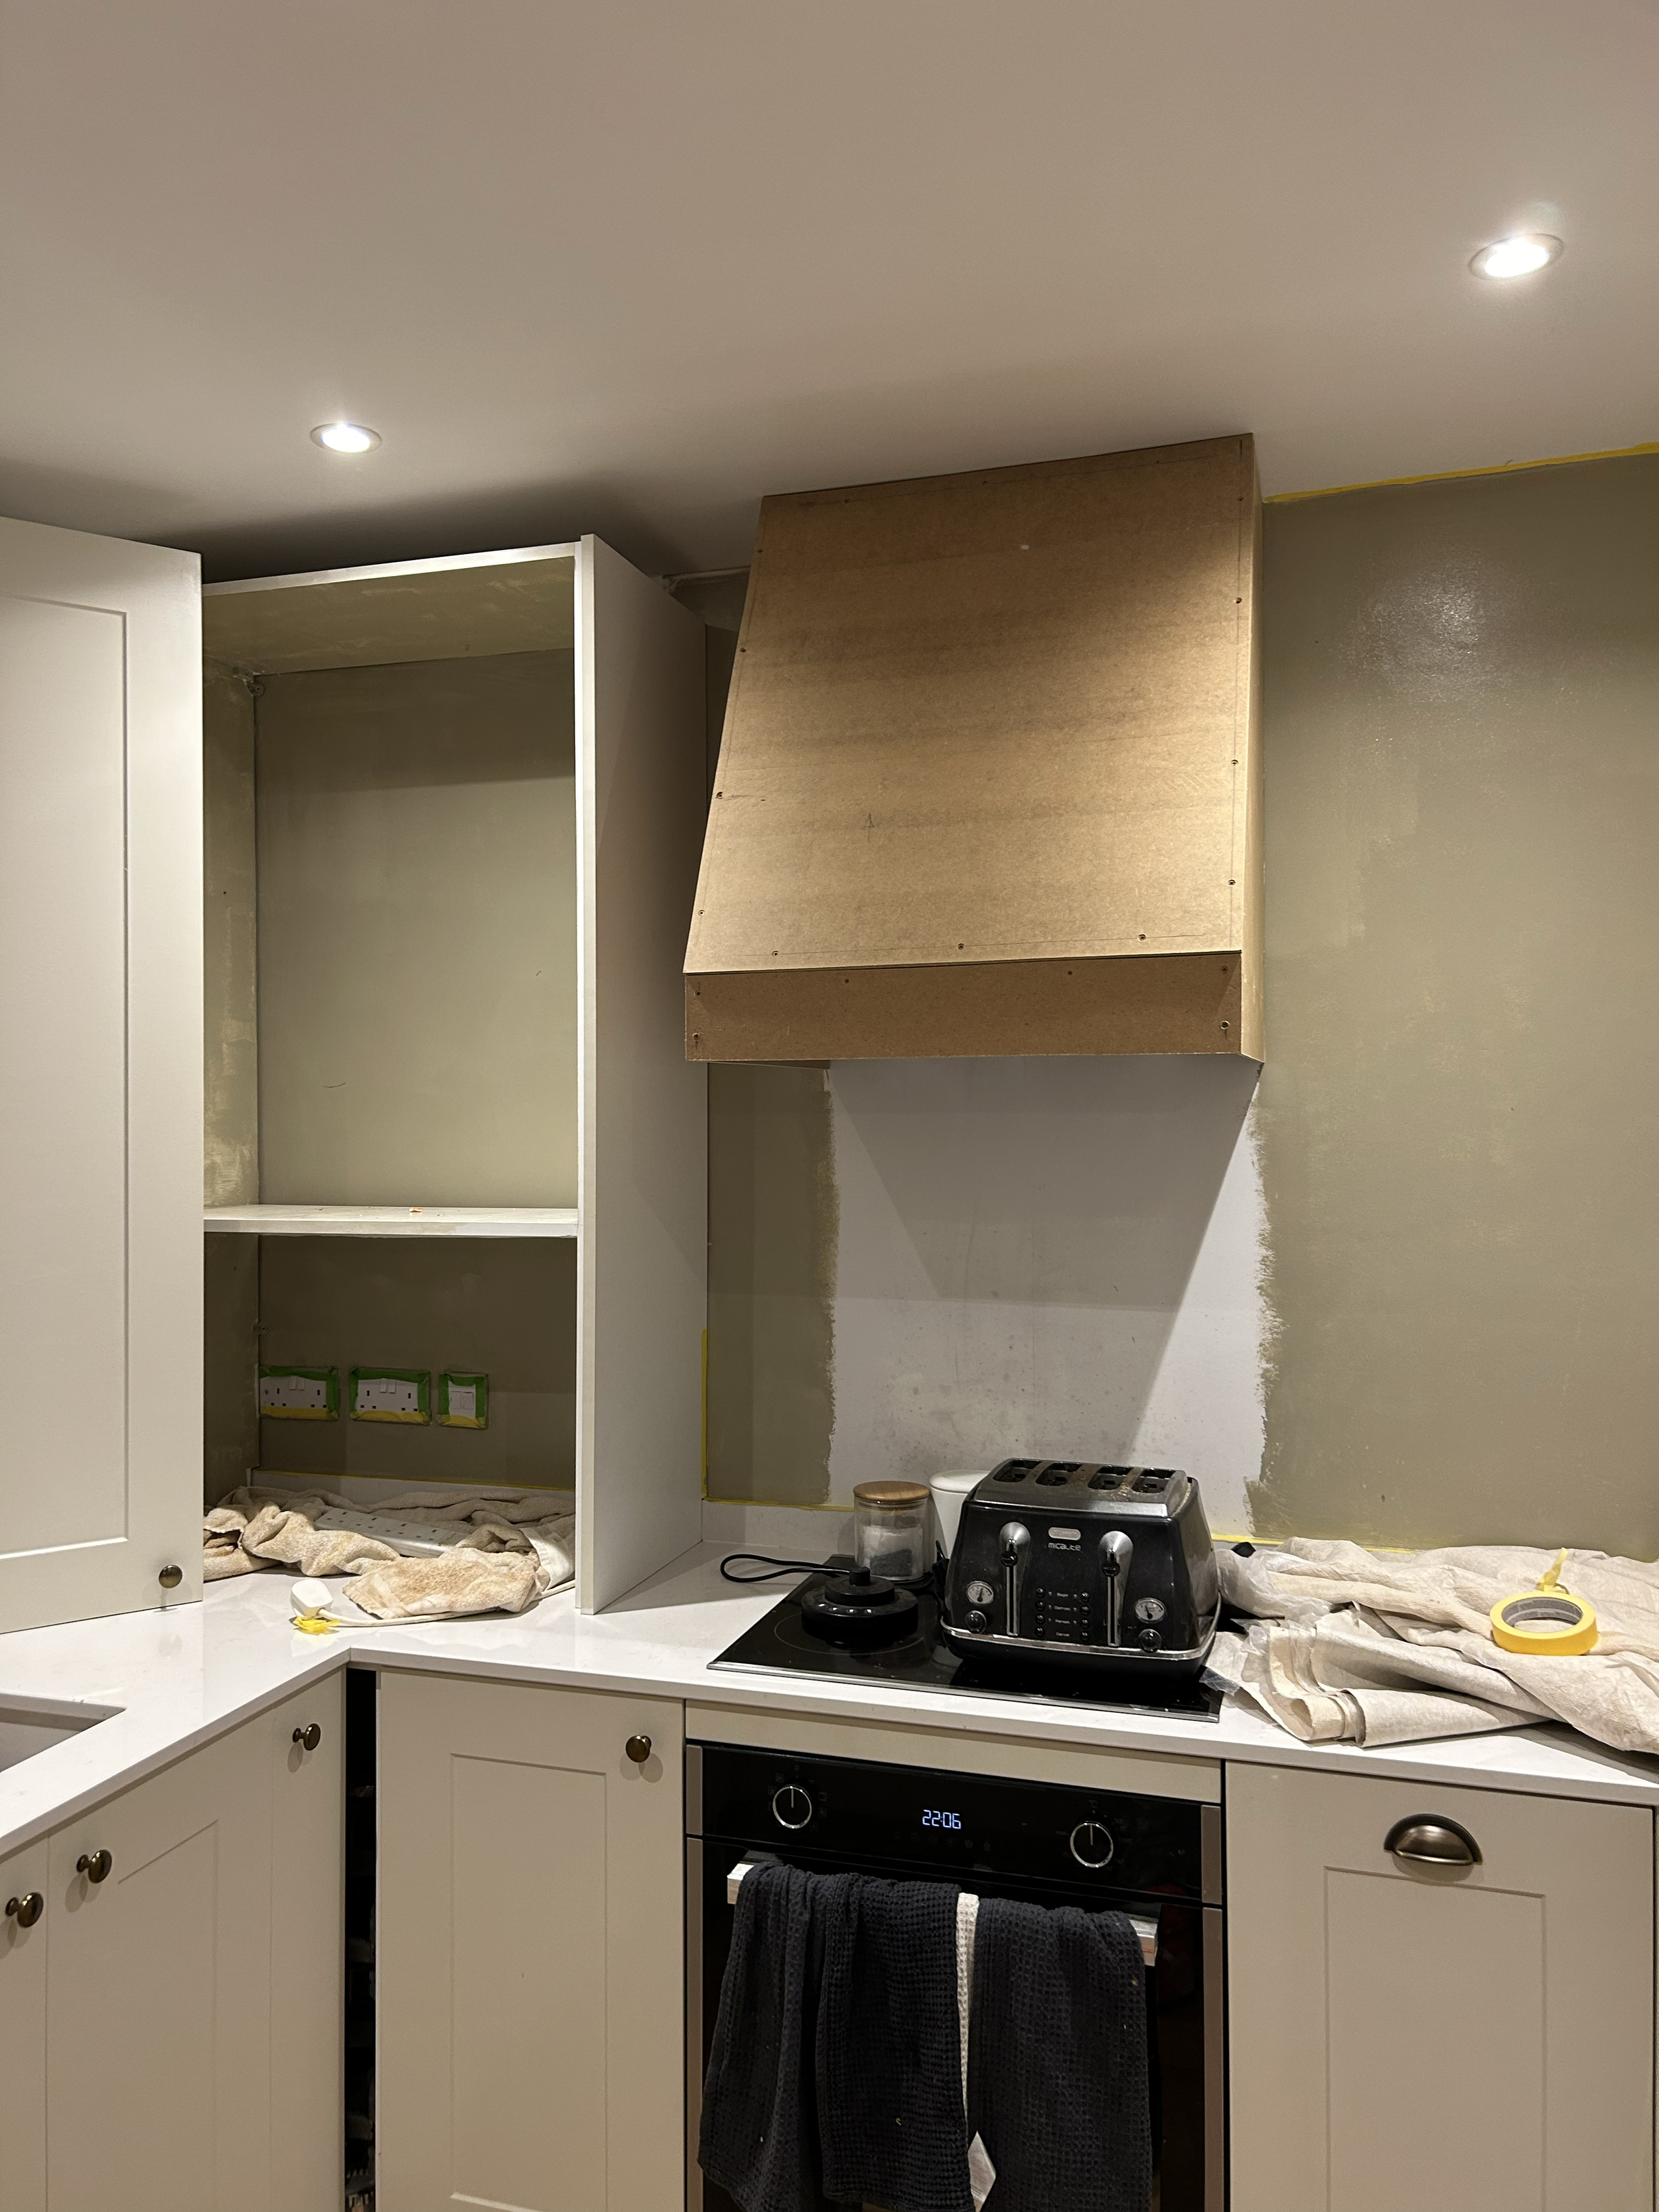
Finishing touches
Once the panels were secured onto the frame (just using wood screws) - we applied some filler and sanded it slightly to create a smooth finish. Then we cut the moulding at 45 degrees and fixed it on using wood glue. We went for a slightly smaller moulding for the lower edging but again, this is personal taste and you can kind of do what you want here.
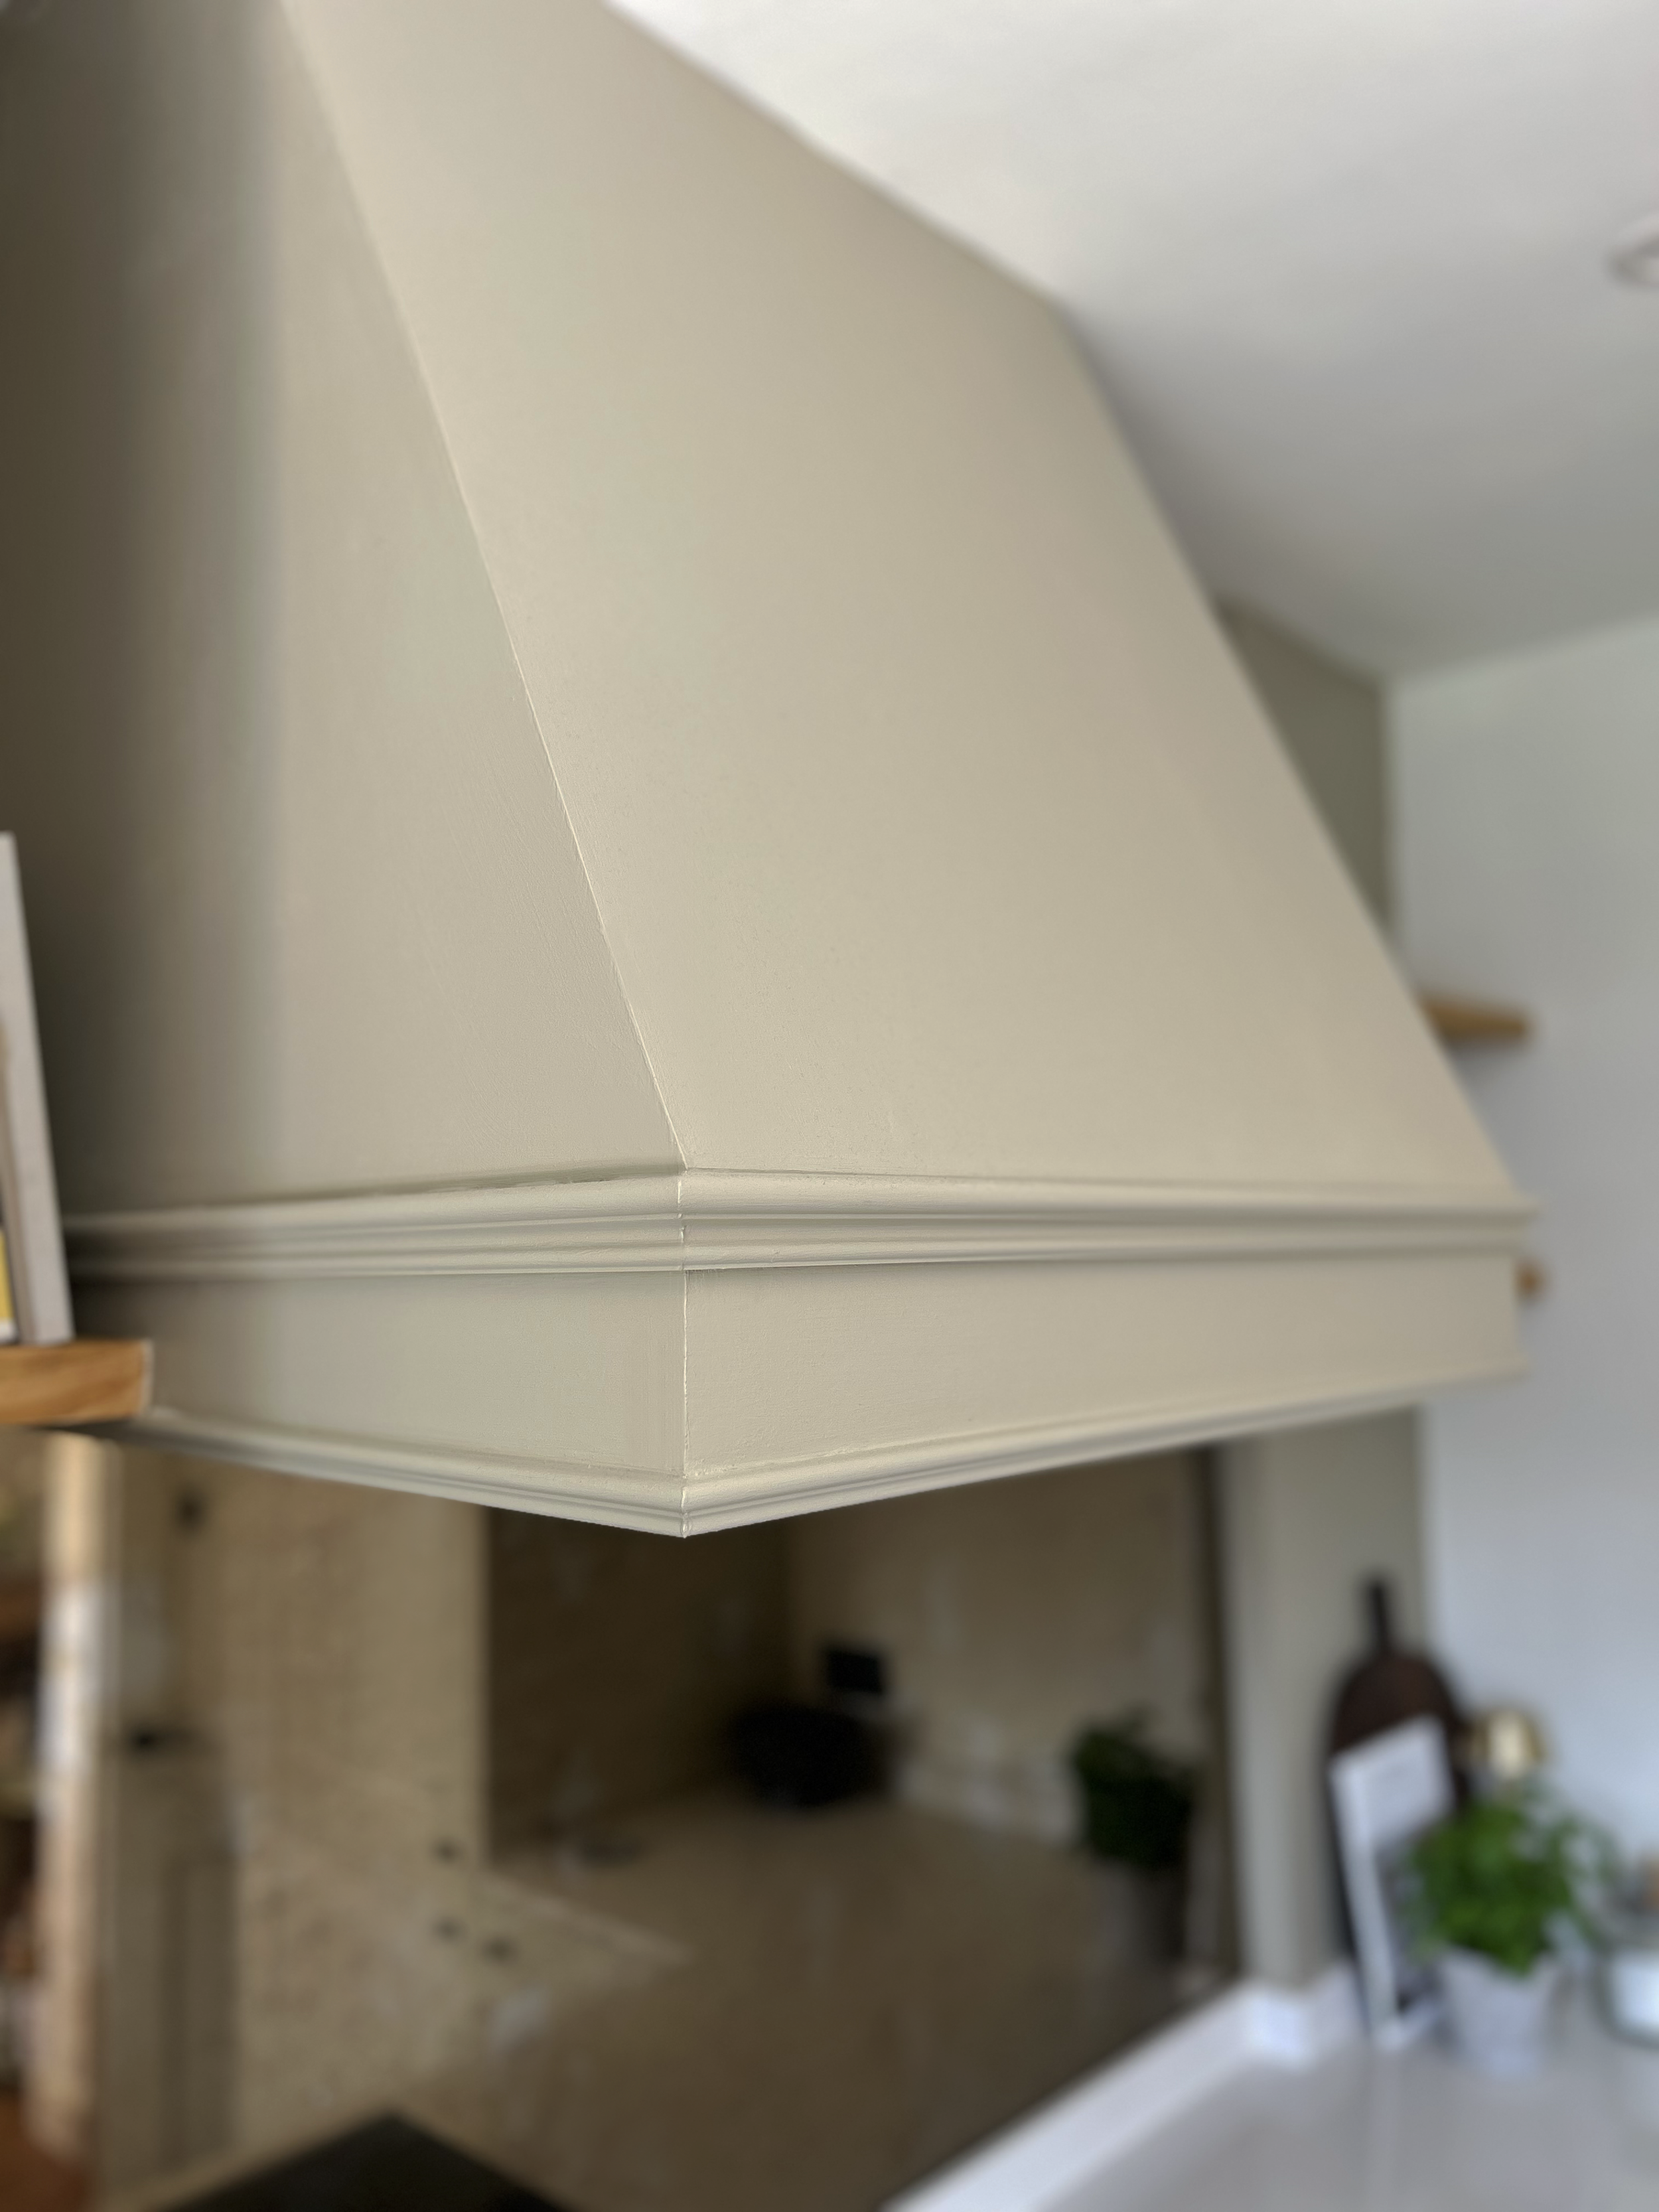
To paint it, you’ll need to prime the MDF with a suitable primer as it’s an absorbent material - my go to is Zinsser Bin Aqua primer, which you can find in most hardware stores. We then gave it two coats of satin wood in the Dulux Heritage colour Setting Stone. This was the same colour as our wall to give it a seamless finish and to give the illusion it’s build in.
And that’s it! A bespoke, built in cooker hood that is still functional at a fraction of the cost - which you can completely tweak to fit with the design of your own kitchen. I hope this was helpful!